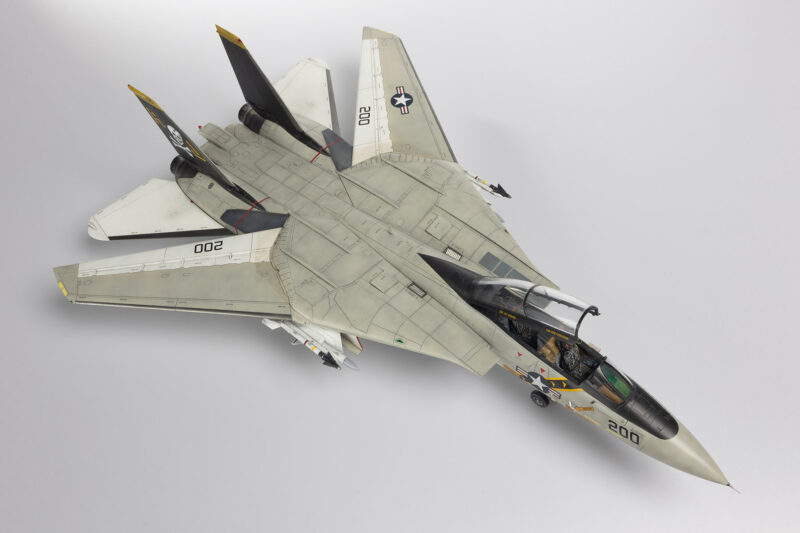
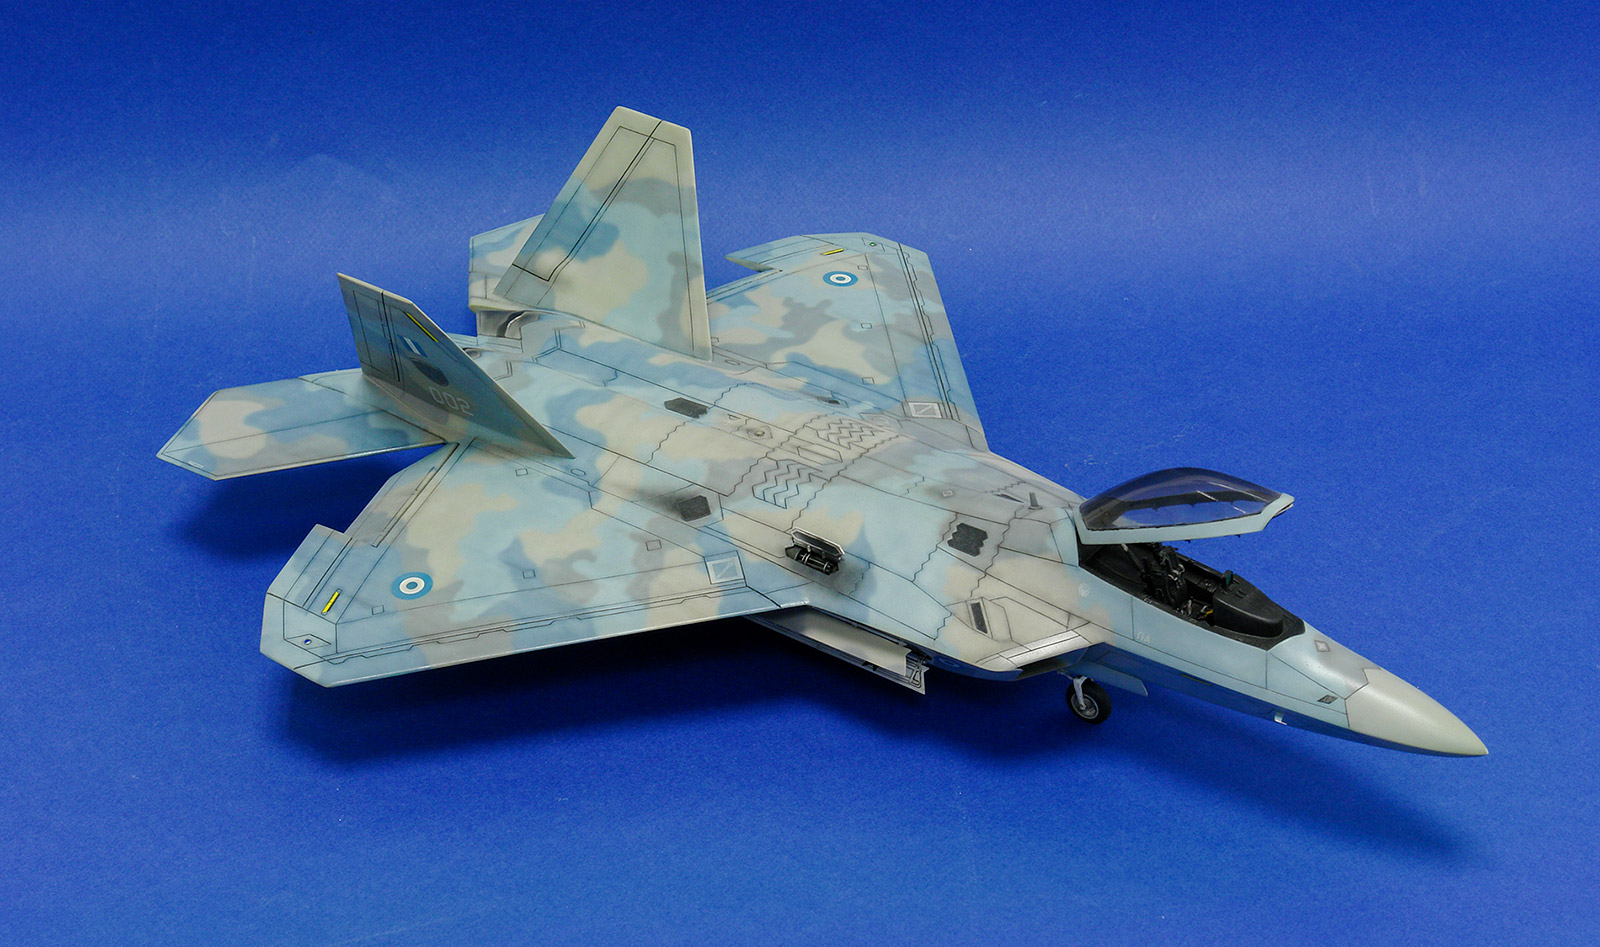
F-22A in 1:48th scale by Italeri. Improvements where made in the missile bay, cockpit and wheel wells. The Vulcan cannon housing was scratch build.

F-22A Lightning ITALERI 1:48
The kit from Italeri (the same mold is sold from Revell as well), until almost one year ago was the only selection available in 1:48. Recently Academy released their version of the F-22, which raised the bar of quality significantly, releaving a lot of modelers from making the Italeri/Revell one. I ( at the time) had to snap one of them, since no Academy F-22 was released yet. This kit is characterized by mistakes on the fuselage (mainly around the jet intakes), bad quality of its engraved panel lines and friction like detail on the supplied open hatches.
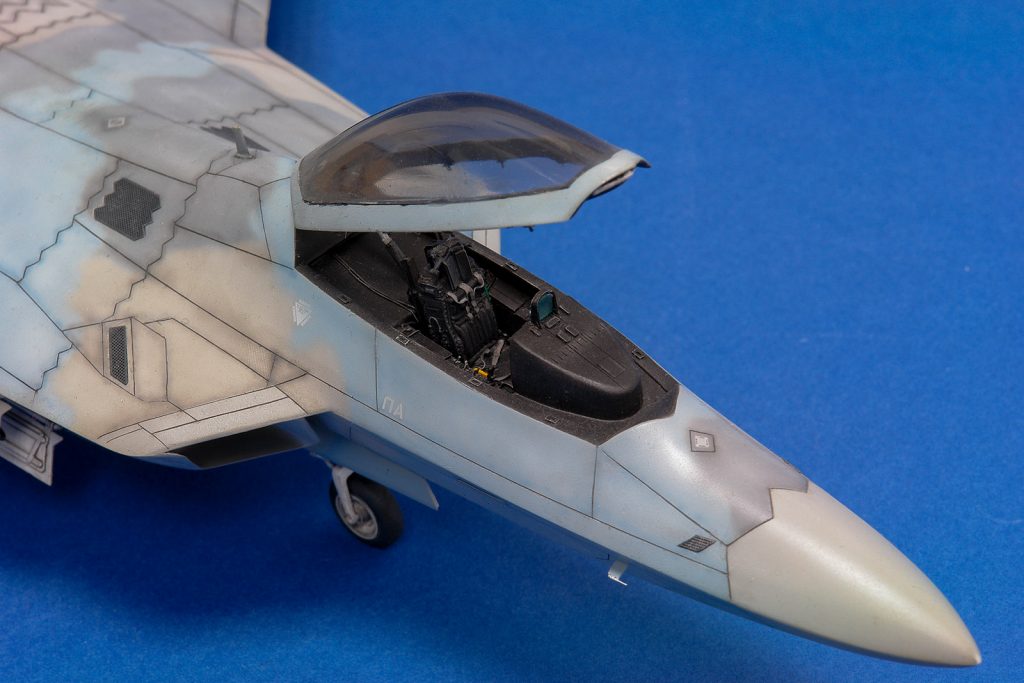
Before even starting the kit, I had decided to use the Legend ACESS II ejection seat which was a big improvement over the kit one. I also used the Eduard detail set for the enrichment of the cockpit and some of the exterior details of the kit.
The Eduard set is not entirely accurate, since it lacks details of the real one (maybe because at the time you could not find enough pictures of this aircraft) while I also did not like the complete lack of levers. So I made some from stretched sprue and added them on the side panels. I continued with improving the detail set to the most difficult task of them all. Adding the 80 total function buttons on top of the four big operation screens of the aircraft. Each one has 20 buttons for different functions, which in 1:48 translates in almost 0.04mm of size for each one. So 80 buttons of that exact size where cut and shaped, and then glued with… Future! A lot of patience and attention required to fulfill this task. The final result did justify its means after all though!!
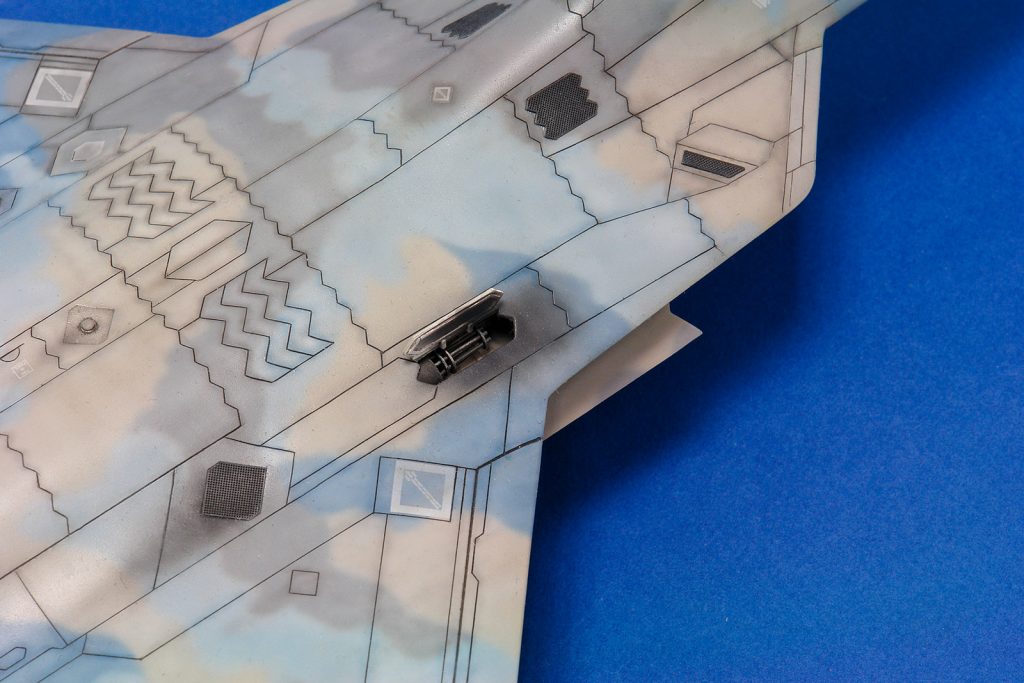
I continued with adding detail in the side panels where the sidewinders are hosted. Next it was time to create the Vulcan and its chamber from scratch. I used stretched sprue for the gun barrels, three different layers of metal plates between them, and ofcourse the chamber that would host it. Also the wheel wells where detailed using copper wire in various sections.
When all those tasks where completed I moved on improving the surface of the kit which really suffers in terms of quality of the engraved lines. It all had to be rescribed, and I had to add some missing panel lines (upper and lower section of the wings) as well, while the general fit of the kit wasn’t helpful for the whole operation.
With the end of this dreadful operation which eventually ended very well, I moved on to the most interesting and fascinating part of the construction, the painting!
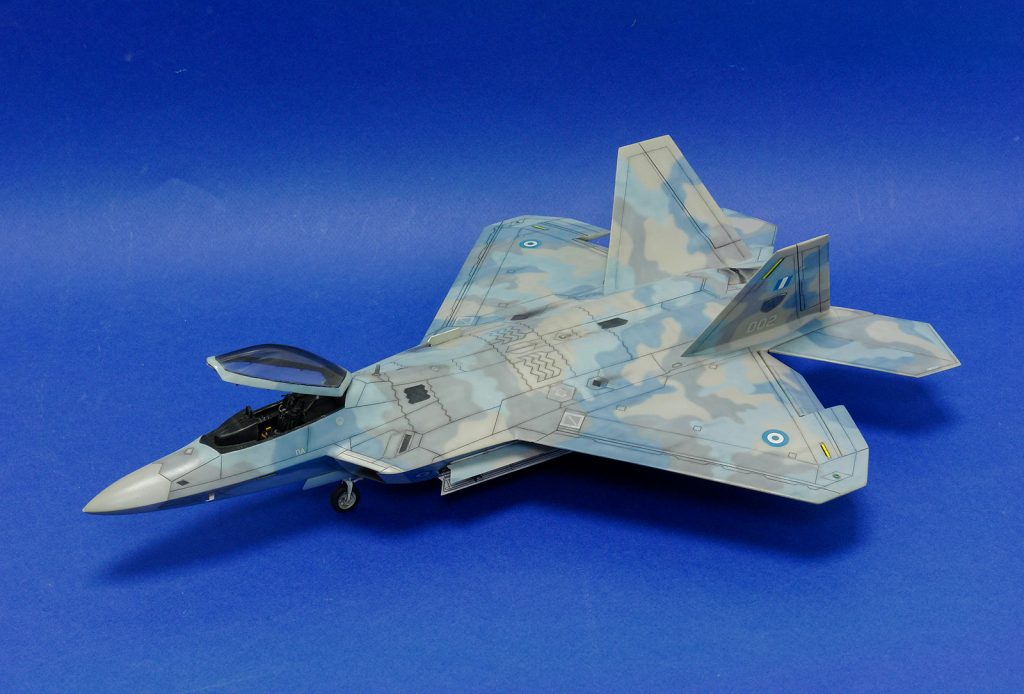
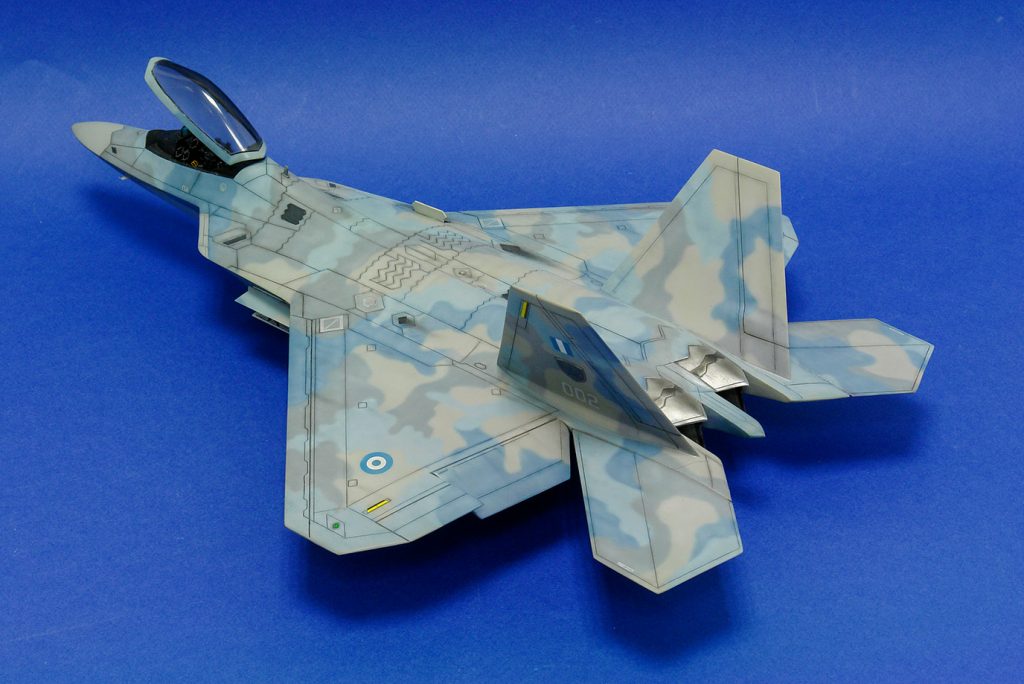
It was already decided that this would be a “What If” camouflage in the Hellenic Colors. I wanted them to complicated, yet pleasant to the eyes of the observer, so I come up to the Ghost-III scheme. Four colors rapping around the whole aircraft looking very much like the Hellenic F-16’s with the only difference of the addition of one more color in the whole pattern.
The colors that I always use are from the “Gunze” acrylic series and they where all mixed in order to achieve the desired outcome. Unfortunately I did not saved a database for the percentage of those mixes, neither the codes of the colors that I used…
The whole aircraft was painte using an airbrush with the 0.2mm nozzle in “freehand mode”. Postshading followed afterwards using lighter and darker tones of each colors in order to achieve the desired “faided” look on the airframe. The jet engines where painted with Alclad aluminium/magnesium /titanium and burnt metal. The epilogue was the positioning of the decals, the wash and a final semi-mat varnish to seal off everything.